|
|
By Oleg Mazurov  A panel of rev.1.21 shields I’ve been working lately on improving manufacturability of my products. As a first result, I’m changing board revision of USB Host Shield to 1.21. The main difference between revisions 1.0 and 1.21 is level converters and jumpers in SMT packages. Picture on the right shows the very first panel of rev.1.21 board fresh from the oven.
Functionally, the board is the same. However, schematic has changed a little in part where control signals go through level converters. Therefore, it is important to use the right schematic when troubleshooting or hacking the shield. Downloads section has been rearranged and documentation for both variants added and labeled. I also posted closeup pictures of new board in store listings for the shield and bare PCB. I still have several rev1.0 boards available, they should be all gone by the end of the week so when you buy a board this week, you may get an old version. If you have a preference, let me know.
Lastly, from now on USB Host Shields comes bundled with stackable headers, the famous 4uconn part numbers 18688 and 18689. “Bundled” here means that by default they come in a bag, un-soldered. However, if you prefer, I can solder them for you – send me an e-mail after the purchase stating that you’d like your headers soldered and indicate the direction, female or male side up.
Oleg.
By Richard Ibbotson  Wiimote controller wit USB Host Shield This is the third part of a series of articles written to describe development of interface between Arduino and popular game controllers using USB Host Shield. Previous parts:
Revision 0.4 – 13th January 2010
Part 3. Develop the Bluetooth USB and HCI interface used in the support of the Wiimote and PS3 game controller, and also some utilities needed to analyse and configure these devices.
1. USB Interface
As before, we first look at the descriptors for the USB dongle using the USB_Desc sketch. The result is:
Continue reading PS3 and Wiimote Game Controllers on the Arduino Host Shield: Part 3
By Richard Ibbotson  Sony PS3 controller This is the second part of a series of articles written to describe development of interface between Arduino and popular game controllers using USB Host Shield. Previous parts:
Revision 0.6 – 13th January 2010
Part 2: Develop the USB interface to the PS3 controller
1. USB Reduced Hosts
Full USB hosts such as Windows and Linux based computers can manage a large variety of different USB devices and load appropriate USB drivers for each device. There is an enumeration or discovery phase where the host gathers information on the attached USB device and uses this information for the driver selection and configuration. In small embedded applications this is not possible or required to support this variety, so the application usually only supports a few devices, often only one. This means the discovery process can be much reduced since the results are already known. This will reduce the memory required for the application by hard coding the device configuration into the application.
Though the configuration will be hard coded, we still need to initially gather the information from the device itself and other sources.
The existing device drivers mentioned above for Windows and Linux are important in our development process. The Windows drivers are usually complete, but not available in source form. Linux drivers are available in source form, though not always as complete. Device manufacturers are usually very reluctant to provide information required to build a driver or embedded application. So we rely on copying Linux code or “sniffing” Windows code to give us guidance.
Continue reading PS3 and Wiimote Game Controllers on the Arduino Host Shield: Part 2
By Richard Ibbotson 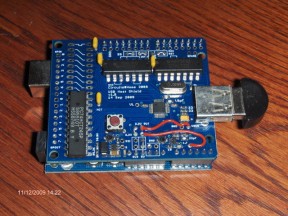 Bluetooth Part 1: Introduction
1. Background
These articles describe how to interface PS3 and Wiimote game controllers directly onto the Arduino using the USB Host Shield. These controllers have not previously been directly connected to an Arduino due to the USB and Bluetooth interfaces and protocols used, and their relative complexity. The game controllers are a good match to the capabilities of the Arduino, and to the imagination of Arduino users, they have not only buttons and joysticks, but also motion sensing, and other goodies which deserve to be in the hands and ideas of Arduino users. Also I hope these articles provide some guidance for people to develop other USB host and Bluetooth applications for small embedded processors.
Arduino already comes in versions which have USB and Bluetooth interfaces, but these are not suitable for our chosen game controllers. When used in USB mode, the PS3 controller is a USB device and needs to talk to a USB host. The normal Arduino USB interface is also a device, so not compatible. When in Bluetooth mode, both of these game controllers use the Bluetooth HID protocol and this is not compatible with the commonly used Bluetooth modules which support only the RFCOMM Serial Port Protocol. Arduino users have successfully used a PC as an intermediary between the game controllers and the Arduino, so the PC is host to both devices.
These articles were written by Richard who is new to the Arduino, blogs, github, libraries, etc, so please give me any help and feedback on how I might improve or correct these articles and software.
Continue reading PS3 and Wiimote Game Controllers on the Arduino Host Shield: Part 1
By Richard Ibbotson  PS3 controller connected to Arduino USB Host Shield Another HID example has been added to Github repository of USB Host Shield for Arduino (which you can purchase in my store) . Richard Ibbotson sent me this nice piece of code along with some pictures. He also posted a short description of his sketch in comments section:
I wrote a sketch for the interface of the PS3 controller over USB. I have two controllers, one Sony and one Madcatz wireless with a USB dongle. Both of these work fine to the USB host shield. I only made one minor change to the library to increase the NAK count. The sketch tests all the function, buttons, joysticks, accelerometer/gyro, leds and rumble. This is not yet under bluetooth just USB. I can set the host bluetooth adddress on the controller though which is needed for bluetooth pairing.
Did not make much attempt to reduce code or data size, so only have about 4K of program space and 240 bytes of data space left, but sketch is pretty long. The actual PS3 part is very small and could be made to a small library.
Next is to move to the bluetooth part, from what I have found on the direct USB, I am pretty confident this will fit even on the 168.
PS3 controller support opens some very interesting possibilities. Not only can it be used as a normal “joystick plus buttons” type of control, but you can also utilize it’s accelerometer/gyro. With wireless variant of the controller all kinds of very powerful radio control are possible. Who is going to be the first to make a mechanical dog, which follows you around and brings back the controller when you throw it away?
If you want to try the sketch, make sure you have the latest library code as well – there are some small but important changes made recently in NAK handling.
 MadCatz wireless controller to USB Host Shield |
 Wireless mini keyboard connected to USB Host Shield |
By Oleg Mazurov  USB Host Shield driving a keyboard
I am continuing on topic of using USB Host shield to drive USB peripherals started in the previous article. The code presented here performs keyboard polls, character translation and management of “LOCK” keys – NumLock, CAPSlock and ScrollLock.
A keyboard is hard to use if results of typing can’t bee seen, so my first step was to add an output device. Even though HD44780-compatible character LCD can be driven with Arduino pins, I wrote a little library which uses GPOUT port of MAX3421E for LCD control. This library is now a part of USB Host Shield repo on github. I used LCD high-level routines from official Arduino distro and developed low-level functions specific to MAX3421E hardware, as well as LCD initialization. Since function syntax and behaviour (and source code ) is identical to official LCD functions, the user manual is already written and can be found in the library reference by title LiquidCrystal. The only difference is in the constructor; since only 4-bit mode is possible and only one pinout is supported, Max_LCD constructor is not accepting any parameters. The pinout of LCD connections to GPOUT is given in the Max_LCD.h file; see also title image of this article.
Continue reading How to drive USB keyboard from Arduino
By Oleg Mazurov
|
In previous article I started talking about constructing magnetic stirrer from PC fan, a pair of rare earth magnets, and plastic can. In this article I will show the rest of the construction as well as program code to control the motor.
When building cases for my designs, I tend to avoid techniques requiring accurate (read “any”) measurements and calling for non-round holes. The design that I’m describing here is no exception. In order to complete it I needed just a few extra parts in addition to plastic joint compound can, PC fan and magnets, arrangement of which was described earlier. I used Arduino controller equipped with Motor Shield from Adafruit to supply PWM current to the fan, 3 nylon standoffs with adhesive bottoms to mount Arduno, rotary encoder to set stirrer speed, and panel-mounted 2.1mm DC power jack. The stirrer is powered from 12V wall wart capable of supplying 300mA or more.
I was thinking of implementing monitoring of motor current to track the moment when stirrer bar loses attraction to the magnets and stops rotating. When I was playing with the stirrer powered from bench suplly the change in current was quite visible. However, I found out later that when motor is supplied with PWM signal, current stays almost constant over the whole range of duty cycles and loads and current tracking won’t work. With regret, I abandoned this clever feedback idea. On the bright side, the code necessary to control the stirrer immediately became much simple, short and easy to understand.
|
 Stirrer code |
Continue reading Vigorius stirring redefined. Part 2 – electronics
By Oleg Mazurov  Four configurations in Arduino blue [EDIT] This post is about legacy product which is no longer supported. Visit USB Host Shield project page for up-to-date information[/EDIT]
Arduino USB Host Shields are in the store. If you are not yet familiar with the project, please browse “USB Shield” category of the site and read the articles. In short, the purpose of this shield is to add USB Host interface capability to Arduino. The software libraries for this shield currently support control and bulk-in transfers, while bulk-out transfer is in the works. Access to GPIO pins of MAX3421E is also supported. Sketch examples, demonstrating USB device control queries and polling USB keyboard, are published. More code will be developed in the future.
At present, four configurations of the shield are available. The first one, called “Minimal”, contains USB core components only. It is compatible with 3.3V Arduinos, such as Arduino Pro from Sparkfun. Also, since no 5V is available, only communication with self-powered devices is possible. Moreover, not every self-powered device would work in this configuration. For unknown reasons, some external hard drives refused to answer until VBUS voltage was raised to 5V. On the other hand, all printers and digital cameras that I and several beta-testers tried worked fine as well as other people’s external hard drives. “Minimal” configuration is the best one for battery-powered projects since 3.3V Arduinos consume less electricity.
Continue reading USB Host Shield in store.
By Oleg Mazurov  USB constructor
The time has come to start using the code to communicate to peripheral devices. There are many devices which work well with microcontrollers. HID devices, such as keyboards, joysticks, and Radio Controller look-a-likes are useful and not too difficult to implement. Another good application of embedded USB host is digital camera control. Communication using Bluetooth and WiFi peripherals are also a possibility.
Today I’m going to show how to communicate with USB keyboard. Standard USB keyboard belongs to a class of devices, called HID (Human Interface Device). The format of data generated by HID device is quite flexible and each device stores it’s data definitions in structures called Report descriptor and Physical descriptor. Generally, to work with the device, report descriptor has to be retrieved and parsed. Because of HID flexibility, a universal HID driver will take many many lines of code. Luckily for us, if all we need is to talk to the keyboard, there is an easier way.
Continue reading Arduino USB Host – Peripherals.
By Oleg Mazurov  Layout closeup
Release candidate 1 boards has been received, built, tested, and came out green wire free – at last! I placed an order for a small batch with board house and expect PCBs to be available in a couple of weeks. I am making second call for beta testers – if you write code and/or blog, drop me a line with a link to your blog and your voltage preference for the shield – 3.3V or 5V. I have more 3.3V boards left from prototyping so naturally people requesting 3.3V boards will have more chances to get one.
Updated Eagle and Gerbers are available in Downloads section. If you don’t have Eagle, here is the PDF of the schematic. Please make sure you are not using scematic posted in one of the previous articles – there are quite a few changes.
In this article I want to give an overview of the board and it’s features. I’d like to start with most complicated part, which is power configuration. First of all, the USB core part of the shield (MAX3421E) requires 3.3V to function. Second, bus-powered USB peripheral requires 5V on Vbus. However, to use self-powered USB peripheral we only need to connect 3.3V to Vbus to be able to see speed-setting pullup resistors. Consequently, for digital camera control applications, shield can be mated with 3.3V Arduino (like Sparkfun‘s Arduino Pro) with no additional power supplies.
Continue reading Arduino USB Host Shield build log. Part 4.
|
|


